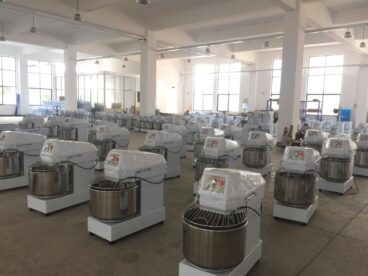
Making sourdough bread at home can be a rewarding and delicious experience. Using a stand mixer simplifies the process, allowing you to focus on the artistry of bread making without the physical strain of kneading by hand. This detailed guide will walk you through each step to help you create perfect sourdough bread with a stand mixer.
Introduction
Sourdough bread, known for its tangy flavor and chewy texture, is a staple in many households. The key to its unique taste lies in the natural fermentation process. A stand mixer not only makes the preparation easier but also ensures consistent results. In this blog post, we’ll cover everything you need to know, from preparing your sourdough starter to baking the final loaf.
What You’ll Need
Before you begin, gather the necessary ingredients and equipment:
- Ingredients:
- 100g active sourdough starter
- 350g water (room temperature)
- 500g bread flour
- 10g salt
- Equipment:
- Stand mixer with a dough hook attachment
- Mixing bowls
- Bench scraper
- Proofing basket (banneton)
- Dutch oven or baking stone
- Parchment paper
- Razor blade or bread lame
Step 1: Prepare the Sourdough Starter
An active sourdough starter is essential for successful bread. If you don’t have one, you can create it by mixing equal parts of flour and water, then allowing it to ferment over several days, feeding it daily. Ensure your starter is bubbly and active before you begin.
- Feeding the Starter:
- Discard half of your starter.
- Add 50g of flour and 50g of water.
- Mix thoroughly and let it sit at room temperature until bubbly and doubled in size (about 4-6 hours).
Step 2: Mixing the Dough
Using a stand mixer simplifies the mixing process, ensuring a well-developed dough without much effort.
- Autolyse:
- In the stand mixer bowl, combine 350g of water and 500g of bread flour.
- Mix until just combined, then cover and let it rest for 30 minutes. This helps the flour hydrate and start gluten development.
- Add the Starter and Salt:
- Add 100g of your active sourdough starter and 10g of salt to the dough.
- Attach the dough hook and mix on low speed until the ingredients are fully incorporated. This should take about 2-3 minutes.
- Kneading:
- Increase the speed to medium and knead the dough for 5-7 minutes until it is smooth and elastic.
- The dough should pull away from the sides of the bowl but still be sticky to the touch.
Step 3: Bulk Fermentation
This is where the magic happens. The dough will ferment, developing flavor and structure.
- First Rise:
- Transfer the dough to a lightly oiled bowl.
- Cover with a damp towel or plastic wrap and let it rise at room temperature for 3-4 hours, or until it has doubled in size.
- Perform stretch and fold every 30 minutes for the first 2 hours. This helps strengthen the dough without kneading.
Step 4: Shaping the Dough
Proper shaping ensures your bread holds its shape and has a good structure.
- Pre-shape:
- Turn the dough out onto a lightly floured surface.
- Using a bench scraper, shape the dough into a round by folding the edges towards the center.
- Let it rest for 15-20 minutes, uncovered.
- Final Shape:
- Using the bench scraper, shape the dough into a tight round or oval, depending on your proofing basket.
- Place the dough seam side up in a floured proofing basket.
- Cover and let it proof at room temperature for 2-3 hours, or until it passes the poke test (when gently poked, the dough springs back slowly).
Step 5: Cold Fermentation (Optional)
For extra flavor and better crumb structure, you can refrigerate the dough.
- Refrigeration:
- Place the covered proofing basket in the refrigerator for 12-24 hours. This cold fermentation slows down the yeast activity, enhancing the flavor.
Step 6: Baking the Bread
Baking at the right temperature and with steam ensures a crispy crust and well-cooked interior.
- Preheat the Oven:
- Preheat your oven to 500°F (260°C) with a Dutch oven inside for at least 30 minutes.
- Scoring:
- Remove the dough from the refrigerator.
- Carefully turn it out onto a piece of parchment paper.
- Use a razor blade or bread lame to score the top of the dough. This allows the bread to expand during baking.
- Baking:
- Transfer the dough (with parchment paper) into the preheated Dutch oven.
- Cover and bake for 20 minutes.
- Reduce the temperature to 450°F (230°C), remove the lid, and bake for an additional 25-30 minutes, or until the crust is deeply golden brown and the internal temperature reaches 210°F (99°C).
- Cooling:
- Transfer the bread to a cooling rack and let it cool completely before slicing. This ensures the interior sets properly.
Tips for Perfect Sourdough Bread
- Consistency: Keep your starter well-fed and active.
- Hydration: Adjust water content based on the flour type and humidity.
- Temperature: Maintain a consistent dough temperature for even fermentation.
- Patience: Allow the dough to ferment and proof adequately for the best flavor and texture.
Troubleshooting Common Issues
- Dense Bread: This can result from under-fermentation or insufficient kneading.
- Flat Loaf: Over-proofing or weak dough structure can cause this.
- Gummy Interior: This is often due to under-baking or too much moisture.
Conclusion
Making sourdough bread with a stand mixer can be a delightful and less strenuous way to enjoy homemade bread. With patience and practice, you’ll perfect your technique and savor the delicious rewards of your efforts. Happy baking!
DONGQING, 20+ years of experience from design, material, production, packaging to shipping, provide customized food machine service,all you need is our target.all you consider is our future.Secure, reliable, fast, convenient and excellent choice for food lover. DONGQING has a stand mixer for every baker,from the B-10 for small-batch baking to the B-60 for high-volume tasks.All DONGQING mixers are built to last and come with a warranty. Welcome to contact us,Visit us for a free quote!


