Homemade marshmallows are a delightful treat that can elevate your desserts, hot chocolates, or even be enjoyed on their own. While they may seem daunting to make, with the right tools and a bit of patience, you can create fluffy, melt-in-your-mouth marshmallows at home. A stand mixer is an essential tool in this process, as it allows you to achieve the perfect texture and consistency that makes marshmallows so special. In this guide, we’ll walk you through the steps to make your own marshmallows using a stand mixer, covering everything from ingredients to troubleshooting common issues.
1. Gathering Ingredients and Tools
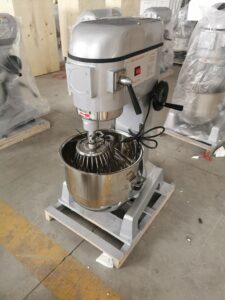
To begin, you’ll need to gather all the necessary ingredients and tools. The primary ingredients for homemade marshmallows are sugar, corn syrup, gelatin, water, and vanilla extract. Optional ingredients include food coloring and flavorings to customize your marshmallows. The tools you’ll need include a stand mixer with a whisk attachment, a candy thermometer, a baking pan, parchment paper, and a spatula. Having everything prepared and measured before you start will make the process smoother and ensure that your marshmallows turn out perfectly.
2. Preparing the Gelatin
The first step in the marshmallow-making process is to prepare the gelatin. Gelatin is what gives marshmallows their structure and spongy texture. To do this, you’ll need to bloom the gelatin by sprinkling it over a bowl of cold water. Allow the gelatin to sit for about 5-10 minutes, during which it will absorb the water and expand. This step is crucial because it ensures that the gelatin is fully hydrated, which will prevent any lumps from forming in the final mixture. Once the gelatin has bloomed, set it aside while you prepare the sugar syrup.
3. Making the Sugar Syrup
Next, you’ll need to prepare the sugar syrup, which is the key to achieving the right consistency in your marshmallows. In a medium saucepan, combine the sugar, corn syrup, and water. Heat the mixture over medium heat, stirring occasionally until the sugar has completely dissolved. Once the sugar is dissolved, stop stirring and attach the candy thermometer to the side of the pan. Continue to cook the syrup until it reaches 240°F (115°C), also known as the soft-ball stage. This stage is critical because it determines the texture of the marshmallows; too low, and they will be too soft, too high, and they will be too firm.
4. Mixing the Gelatin and Sugar Syrup
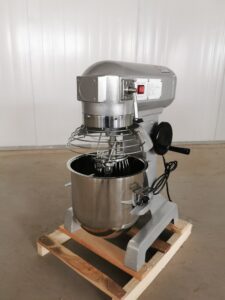
With your sugar syrup ready, it’s time to combine it with the gelatin. Start by turning your stand mixer on low speed, then carefully pour the hot sugar syrup down the side of the mixing bowl, avoiding the whisk attachment. The hot syrup will melt the bloomed gelatin, and the mixture will begin to thicken. Once all the syrup is added, gradually increase the mixer speed to high. The mixture will start to foam and expand as air is incorporated, transforming into a fluffy, white marshmallow base. Continue mixing for about 10-15 minutes until the mixture becomes thick, glossy, and has cooled to lukewarm.
5. Adding Flavorings and Coloring
Once your marshmallow mixture has reached the right consistency, it’s time to add any flavorings or coloring. Vanilla extract is the traditional flavoring for marshmallows, but you can experiment with other extracts like peppermint, almond, or even fruit purees for a unique twist. Add the flavorings while the mixer is still running to ensure they are fully incorporated. If you want to add color, now is the time to do so. Gel food coloring works best, as it won’t affect the consistency of the marshmallow mixture. Add a few drops of color and mix until evenly distributed.
6. Preparing the Pan
While the marshmallow mixture is still in the mixer, prepare your baking pan. Line the pan with parchment paper, leaving some overhang to help lift the marshmallows out later. Lightly grease the parchment paper with a neutral oil or cooking spray to prevent sticking. You can also dust the parchment with a mixture of powdered sugar and cornstarch for added non-stick protection. This step is important to ensure that your marshmallows release easily from the pan after they’ve set.
7. Pouring and Setting the Marshmallows
Now that your pan is ready, it’s time to pour the marshmallow mixture into it. Use a spatula to scrape the mixture out of the mixing bowl and into the prepared pan. The mixture will be sticky, so work quickly and try to spread it evenly across the pan. If needed, you can lightly grease the spatula or your hands to help smooth the top of the marshmallows. Once the mixture is evenly spread, let it sit at room temperature for at least 4 hours, or preferably overnight, to fully set.
8. Cutting and Coating the Marshmallows
After the marshmallows have set, it’s time to cut them into individual pieces. Lift the marshmallow slab out of the pan using the parchment paper overhang and place it on a cutting board. Use a sharp knife or kitchen scissors, lightly greased with oil, to cut the marshmallows into squares or your desired shapes. To prevent sticking, toss the cut marshmallows in a mixture of powdered sugar and cornstarch. This coating will keep the marshmallows from sticking together and give them a smooth, powdery finish.
9. Storing and Enjoying Your Marshmallows
Homemade marshmallows can be stored in an airtight container at room temperature for up to two weeks. Avoid refrigerating them, as this can cause them to become too firm. You can enjoy your marshmallows in a variety of ways—add them to hot chocolate, use them in s’mores, or simply eat them as is. They also make wonderful gifts, especially when packaged in decorative bags or boxes. With your stand mixer and this guide, you can enjoy the satisfaction of making your own marshmallows from scratch, delighting both yourself and others with this sweet treat.
10. Troubleshooting Common Issues
Even with the best preparation, sometimes things don’t go as planned. If your marshmallows turn out too soft, it could be due to undercooking the sugar syrup. Make sure to reach the correct temperature before mixing with the gelatin. If your marshmallows are too firm, the sugar syrup may have been cooked too long. Always use a reliable candy thermometer to ensure accuracy. Additionally, if your marshmallows are sticky or difficult to cut, try dusting them with more powdered sugar and cornstarch, and make sure your knife is greased.
This detailed guide should help you confidently make homemade marshmallows using a stand mixer, with each step carefully explained to ensure a successful and enjoyable experience.
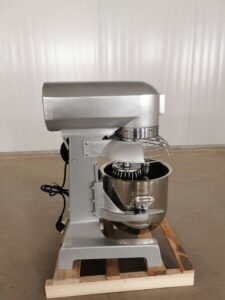
DONGQING, 20+ years of experience from design, material, production, packaging to shipping, provide customized food machine service,all you need is our target.all you consider is our future.Secure, reliable, fast, convenient and excellent choice for food lover. DONGQING has a stand mixer for every baker,from the B-10 for small-batch baking to the B-60 for high-volume tasks.All DONGQING mixers are built to last and come with a warranty. Welcome to contact us,Visit us for a free quote!


