Introduction
Creating perfect dough is the cornerstone of successful baking. Whether you’re making bread, pizza, or pastries, the consistency and texture of your dough can make or break your recipe. A stand mixer can simplify this process and provide consistent results. In this detailed guide, we will cover everything you need to know about using a stand mixer to achieve perfect dough, from understanding your mixer to troubleshooting common issues.
Understanding Your Stand Mixer
To get started, it’s important to familiarize yourself with your stand mixer and its components.
Parts of a Stand Mixer
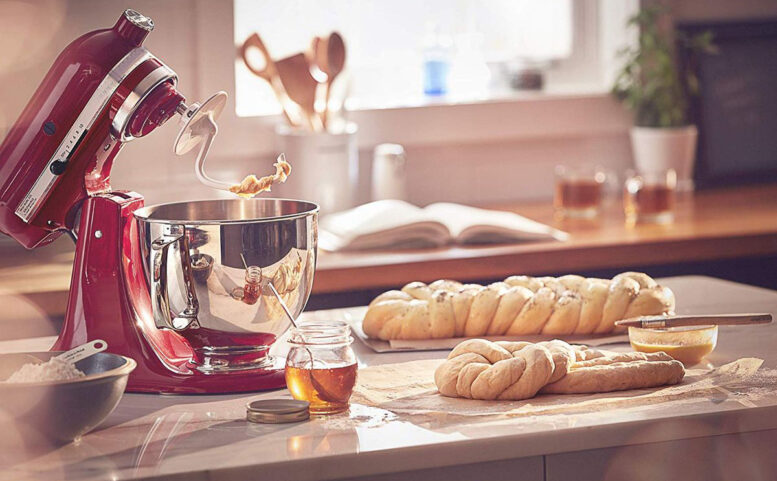
- Bowl: The mixing bowl is where all the magic happens. It’s typically made of stainless steel and locks securely into the mixer base. Bowls come in various sizes, so choose one that fits your baking needs.
- Attachments: Stand mixers come with several attachments, including the dough hook, paddle, and whisk. Each has a specific purpose:
- Dough Hook: Designed specifically for kneading dough, the dough hook mimics the motion of hand kneading.
- Paddle Attachment: Ideal for mixing batters and cookie dough.
- Whisk Attachment: Used for whipping cream, egg whites, and other aerated mixtures.
- Speed Settings: Stand mixers have multiple speed settings, ranging from slow stirring to high-speed whipping. Understanding when to use each speed is crucial for achieving the perfect dough.
| Part | Description |
|---|---|
| Bowl | The mixing bowl is where all the magic happens. It’s typically made of stainless steel and locks securely into the mixer base. Bowls come in various sizes. |
| Attachments | Stand mixers come with several attachments, each with a specific purpose: |
| Dough Hook | Designed specifically for kneading dough, the dough hook mimics the motion of hand kneading. |
| Paddle Attachment | Ideal for mixing batters and cookie dough. |
| Whisk Attachment | Used for whipping cream, egg whites, and other aerated mixtures. |
| Speed Settings | Stand mixers have multiple speed settings, ranging from slow stirring to high-speed whipping. Understanding when to use each speed is crucial for perfect dough. |
Choosing the Right Stand Mixer Not all stand mixers are created equal, especially when it comes to making dough. When selecting a mixer, consider the following factors:
- Motor Power: A powerful motor is essential for kneading dough. Look for mixers with at least 300 watts of power.
- Stability: The mixer should be heavy enough to remain stable while kneading. Lightweight mixers may move or tip over.
- Bowl Size: Choose a bowl size that matches your typical baking quantities. Larger bowls are better for making bigger batches of dough.
- Durability: Opt for mixers made from high-quality materials with positive reviews for long-term use.
Preparing Your Ingredients
The quality and preparation of your ingredients can significantly affect your dough’s outcome.
Measuring Ingredients Accurately Accurate measurements are critical in baking. Use a kitchen scale for precision. Here are some tips:
- Flour: Spoon flour into the measuring cup and level it off with a knife. Avoid packing it down.
- Water and Other Liquids: Use a liquid measuring cup for accuracy. Eye level measurements are best.
- Yeast: Check the expiration date. Old yeast may not activate properly.
- Salt and Sugar: Measure these carefully, as they affect yeast activity and dough flavor.
Importance of Room Temperature Ingredients Ingredients at room temperature mix more easily and activate yeast more effectively. Take out butter, eggs, and other perishables at least 30 minutes before starting your recipe.

stand mixer
Common Ingredients for Different Types of Dough
- Bread Dough: Typically includes flour, water, yeast, salt, and sometimes sugar or oil.
- Pizza Dough: Similar to bread dough but often includes olive oil for flavor.
- Pastry Dough: Includes flour, butter, sugar, and sometimes eggs.
Using the Dough Hook Attachment
The dough hook is your best friend when it comes to kneading dough with a stand mixer.
Attaching the Dough Hook Securely attach the dough hook to your mixer. Ensure it’s properly aligned and locked in place. Refer to your mixer’s manual if needed.
Understanding the Role of the Dough Hook The dough hook is designed to mimic the hand kneading process. It folds and stretches the dough, which helps develop gluten. Gluten gives dough its elasticity and structure, essential for a good rise and texture.
Mixing the Dough
Proper mixing is the first step to achieving perfect dough.
Adding Ingredients to the Mixer Bowl Start by adding dry ingredients (flour, salt, yeast) to the mixer bowl. Gradually add wet ingredients (water, oil) while the mixer is running on low speed. This prevents flour from flying out and ensures even mixing.
Start with Dry Ingredients First Adding dry ingredients first allows them to mix evenly before the wet ingredients are incorporated. This helps avoid clumps and ensures a uniform dough.
Gradually Adding Wet Ingredients Pour wet ingredients slowly to allow the dough to come together gradually. This helps in achieving the right consistency without overworking the dough.
Mixing on Low Speed Initially Begin mixing on the lowest speed setting. This prevents ingredients from splattering and allows the dough to come together gently.
Kneading the Dough
Kneading is a critical step in dough preparation.
Increasing the Speed for Kneading Once ingredients are combined, increase the mixer speed to medium. Knead the dough for 5-10 minutes, depending on your recipe. The dough should be smooth and elastic.
How to Tell When the Dough is Properly Kneaded Properly kneaded dough will be smooth, elastic, and slightly tacky to the touch. It should pull away from the sides of the bowl cleanly.
Common Signs of Well-Kneaded Dough
- Smooth Texture: The dough should be free of lumps.
- Elasticity: It should stretch without tearing.
- Windowpane Test: Stretch a small piece of dough into a thin membrane. If it doesn’t tear and allows light to pass through, it’s ready.
Tips for Perfect Dough
Achieving perfect dough requires attention to detail and a few tips.
Monitoring the Dough During Mixing and Kneading Keep an eye on the dough as it mixes. If it sticks to the bowl, add a bit more flour. If it’s too dry, add a teaspoon of water at a time.
Adjusting for Humidity and Temperature Humidity and temperature can affect dough consistency. In humid conditions, you may need less water. In dry conditions, you might need more. Adjust accordingly.
Avoiding Over-Kneading and Under-Kneading
- Over-Kneading: Can make dough tough and chewy. Stop kneading when the dough is smooth and elastic.
- Under-Kneading: Results in dense, heavy bread. Ensure the dough passes the windowpane test.
Troubleshooting Common Issues
Even experienced bakers encounter issues. Here’s how to troubleshoot common problems.
Dough is Too Sticky or Too Dry
- Sticky Dough: Gradually add more flour until the dough reaches the right consistency.
- Dry Dough: Add water a teaspoon at a time until the dough is smooth and elastic.
Dough Doesn’t Rise Properly
- Yeast Issues: Ensure your yeast is fresh and active. Check the expiration date and proof it in warm water if necessary.
- Temperature Issues: Dough rises best in a warm, draft-free environment. If your kitchen is cold, let the dough rise in a warm oven or near a heat source.
How to Fix Common Mistakes
- Under-Kneaded Dough: Knead a bit longer until it passes the windowpane test.
- Over-Kneaded Dough: Let it rest longer before shaping.
Cleaning and Maintenance of Your Stand Mixer
Proper cleaning and maintenance will extend the life of your stand mixer.
Proper Cleaning Techniques for the Bowl and Attachments
- Bowl and Attachments: Detach and wash them with warm, soapy water. Avoid using abrasive cleaners that could scratch the surface.
- Mixer Base: Wipe down with a damp cloth. Avoid submerging in water.

Maintaining the Motor and Other Parts Regularly check the motor and moving parts for wear and tear. Refer to your mixer’s manual for specific maintenance guidelines.
Recipes to Try
Put your new skills to the test with these basic dough recipes.
Basic Bread Dough
- Ingredients: Flour, water, yeast, salt, sugar
- Instructions: Mix dry ingredients, add water, knead for 8 minutes, let rise, shape, and bake.
Pizza Dough
- Ingredients: Flour, water, yeast, salt, olive oil
- Instructions: Mix dry ingredients, add water and oil, knead for 7 minutes, let rise, shape, and bake.
Pastry Dough
- Ingredients: Flour, butter, sugar, salt, water
- Instructions: Mix dry ingredients, cut in butter, add water, knead briefly, chill, roll out, and bake.

Conclusion
Perfect dough is within your reach with the right techniques and tools. By understanding your stand mixer, preparing ingredients accurately, and mastering the mixing and kneading process, you can consistently create delicious dough for any recipe. Practice makes perfect, so don’t hesitate to experiment and refine your skills. Happy baking!
DONGQING, 20+ years of experience from design, material, production, packaging to shipping, provide customized food machine service,all you need is our target.all you consider is our future.Secure, reliable, fast, convenient and excellent choice for food lover. DONGQING has a stand mixer for every baker,from the B-10 for small-batch baking to the B-60 for high-volume tasks.All DONGQING mixers are built to last and come with a warranty. To learn more, visit DONGQING today and shop for the perfect stand mixer.Welcome to contact us,Visit us for a free quote!


